One of Tamlex’s strengths as a manufacturer is the ability to react to individual customer requirements. Whether the requirement is for a range of standard products to be delivered direct to a site address or it is for a complete installation kit of bespoke manufactured products Tamlex can and has met this demand.
Screed trunking must be installed on a solid foundation and completely supported by a screed ribbon.
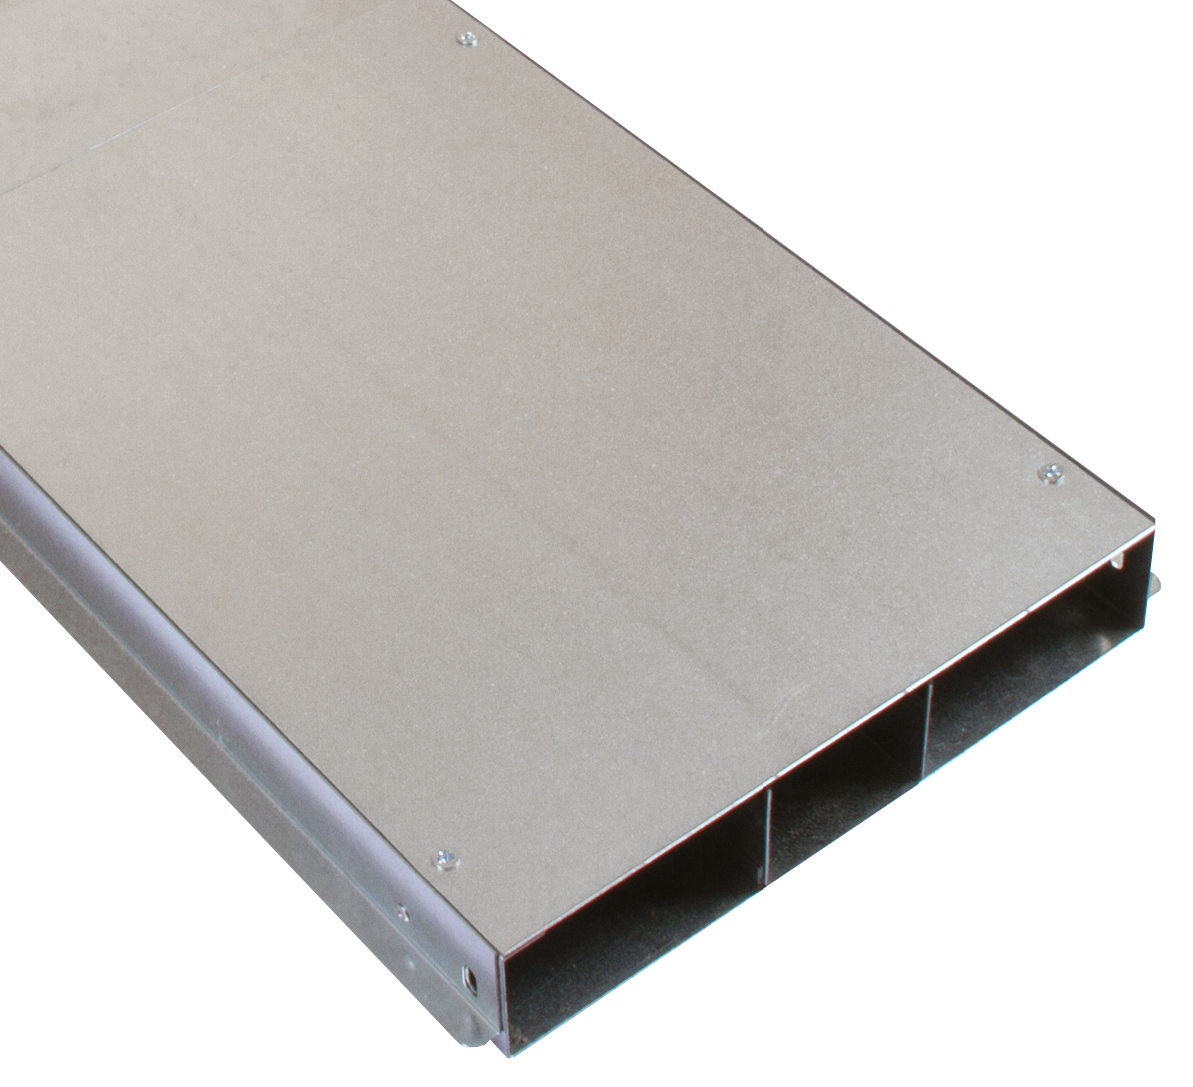
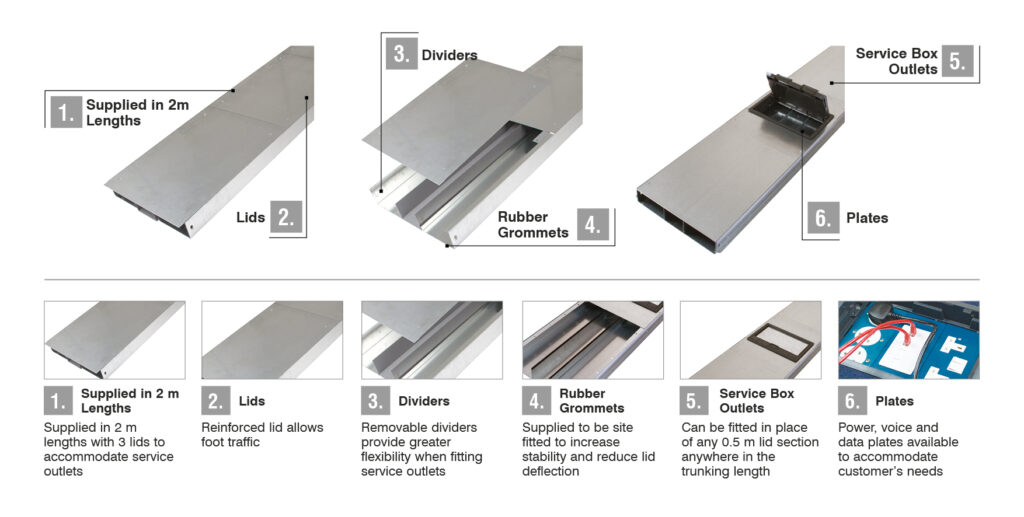
3 segmented compartments to accommodate service boxes
Reinforced lid allows foot traffic
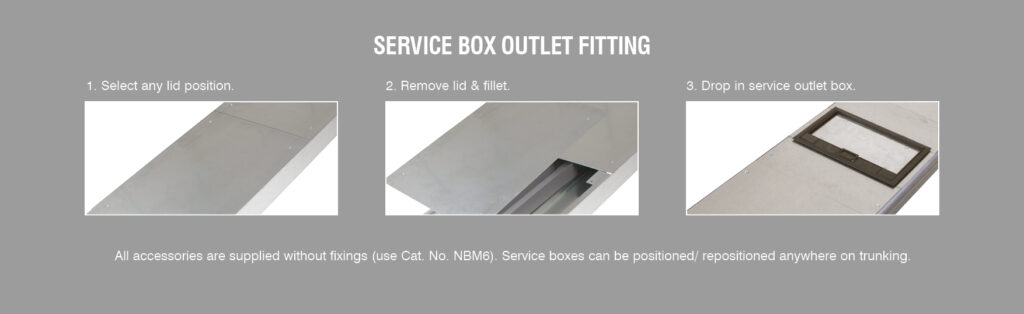
Service boxes can be fitted after trunking is installed
Supplied in standard 2 m lengths with couplers
Supplied in standard 2 m lengths with 4 x 0.5 m lid sections and joining coupler. Rubber grommet supplied to be site fitted.
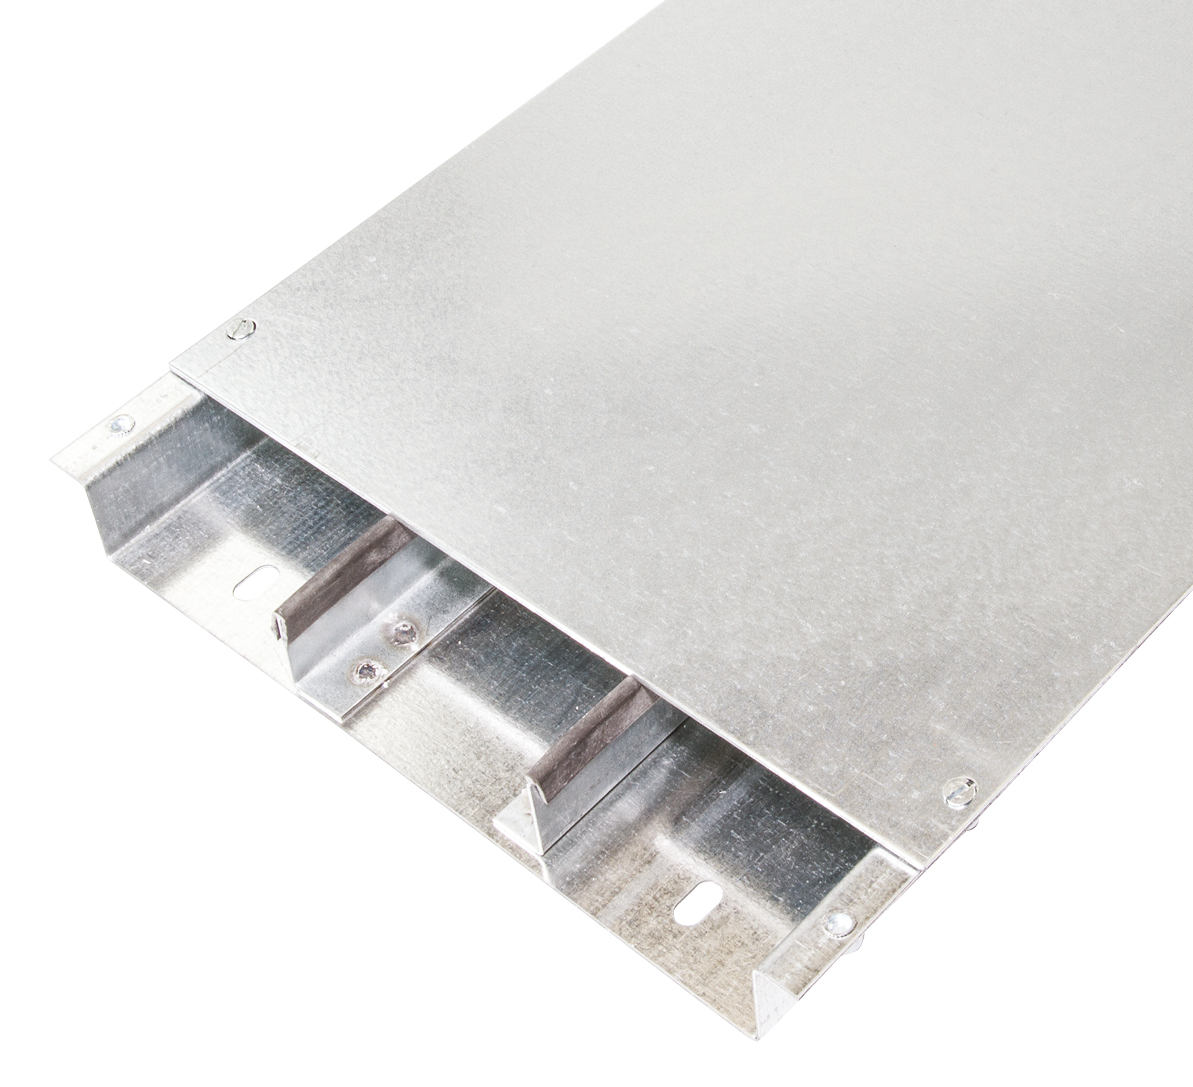
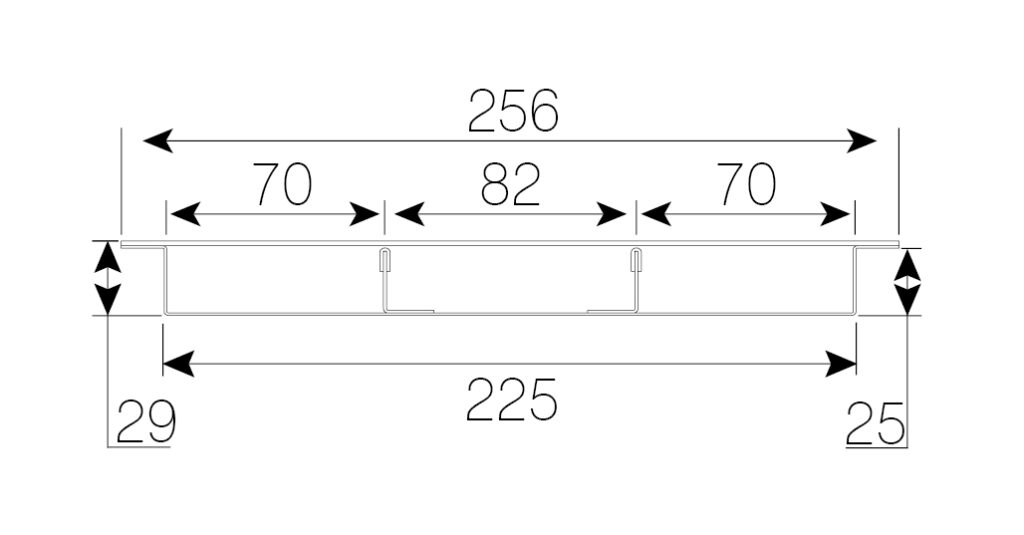
3 segregated compartments
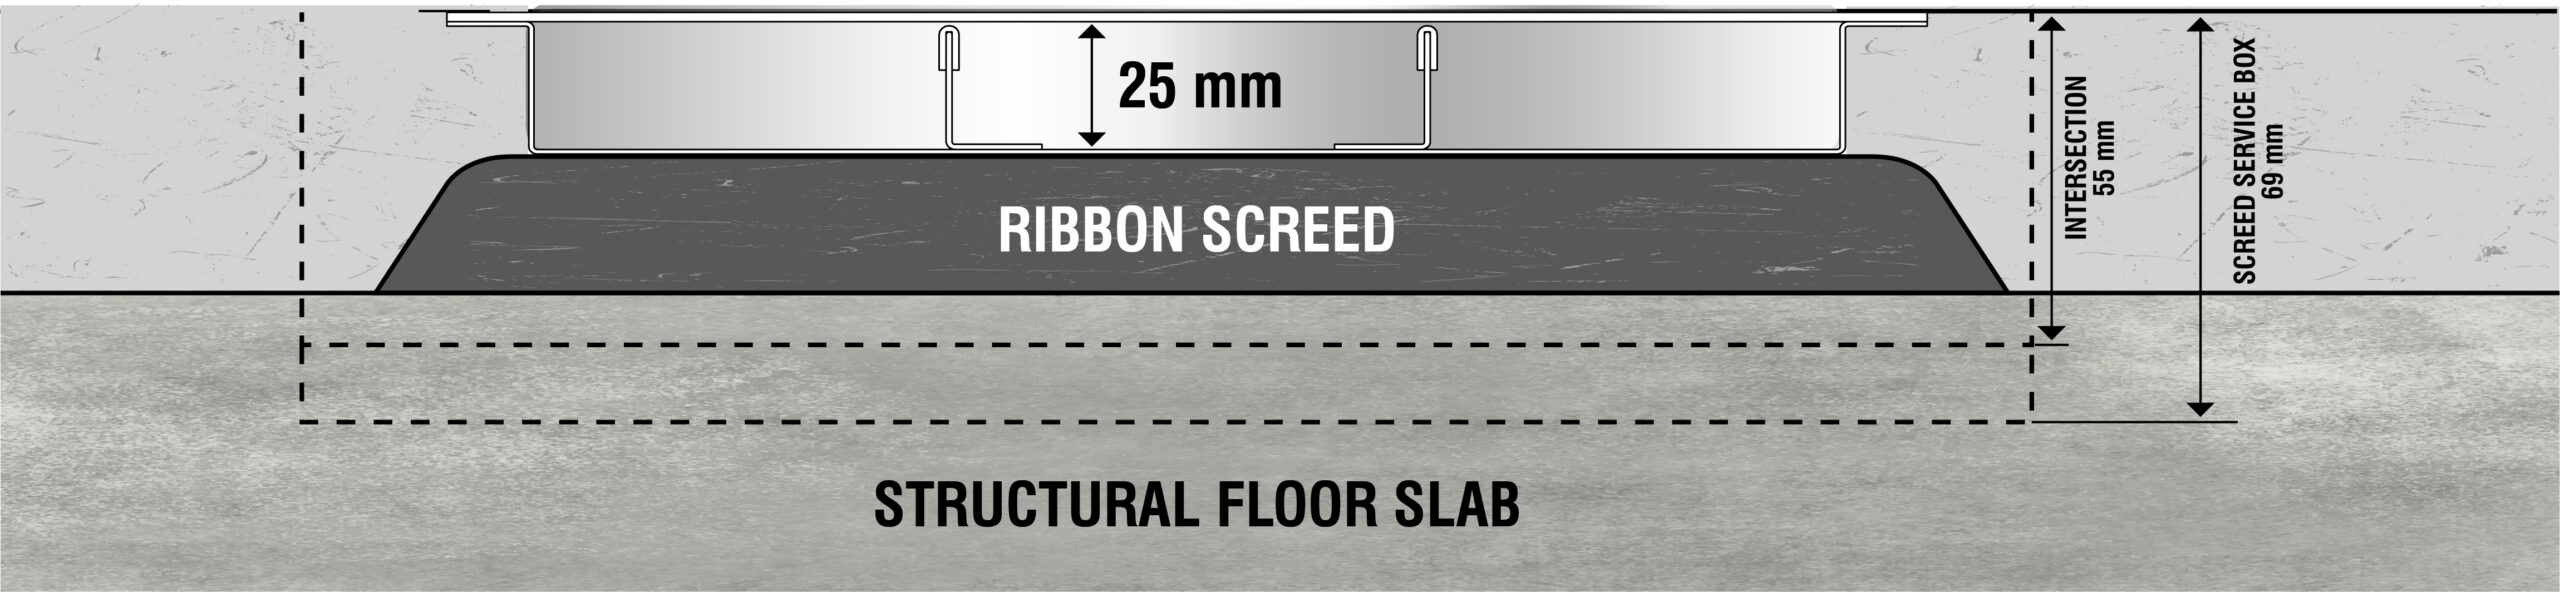
Shallow 25 mm deep trunking profile
Reinforced lid to allow foot traffic
Manufactured from zinc galvanised steel strip to BSEN 10346:2015
Fillets have gasket strip fitted to increase stability and reduce lid deflection
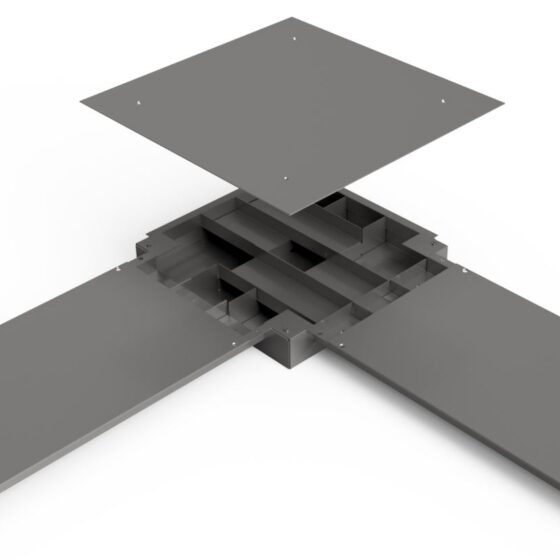
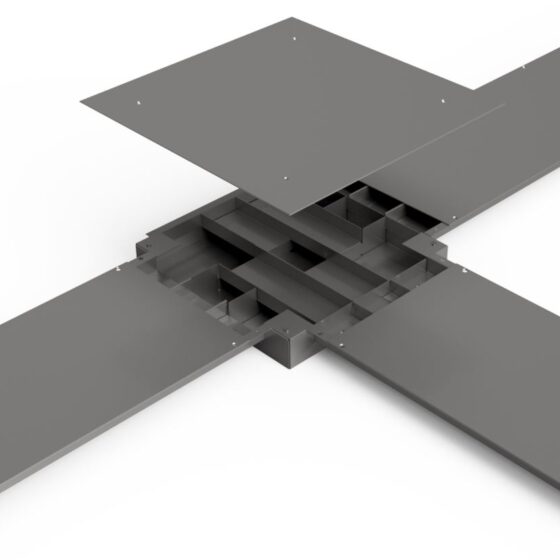
Intersections are 55 mm deep to allow the maximum cable capacity throughout the system
2 m length complete with 2 x 1 m lids & coupler. Jacking bolts need to be ordered separately (M6 x 40 mm) Cat. No. TF005.
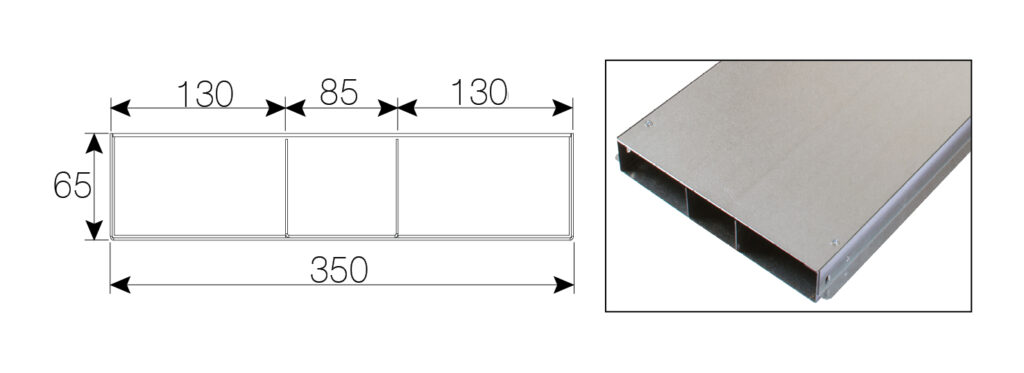
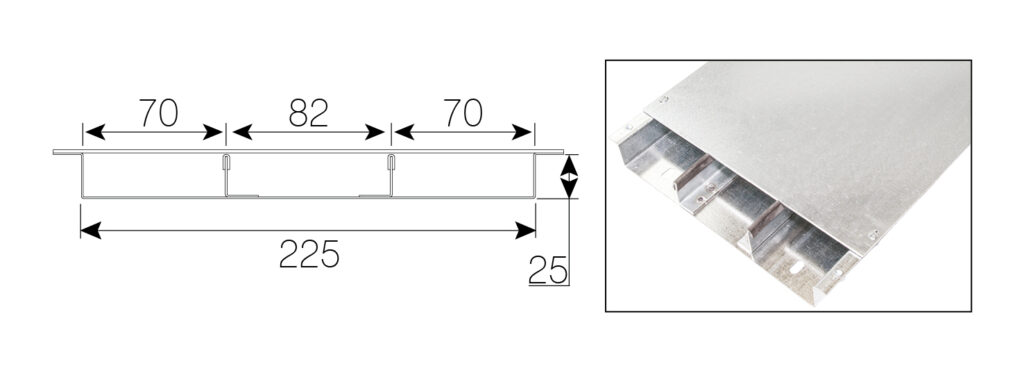
Dimensions
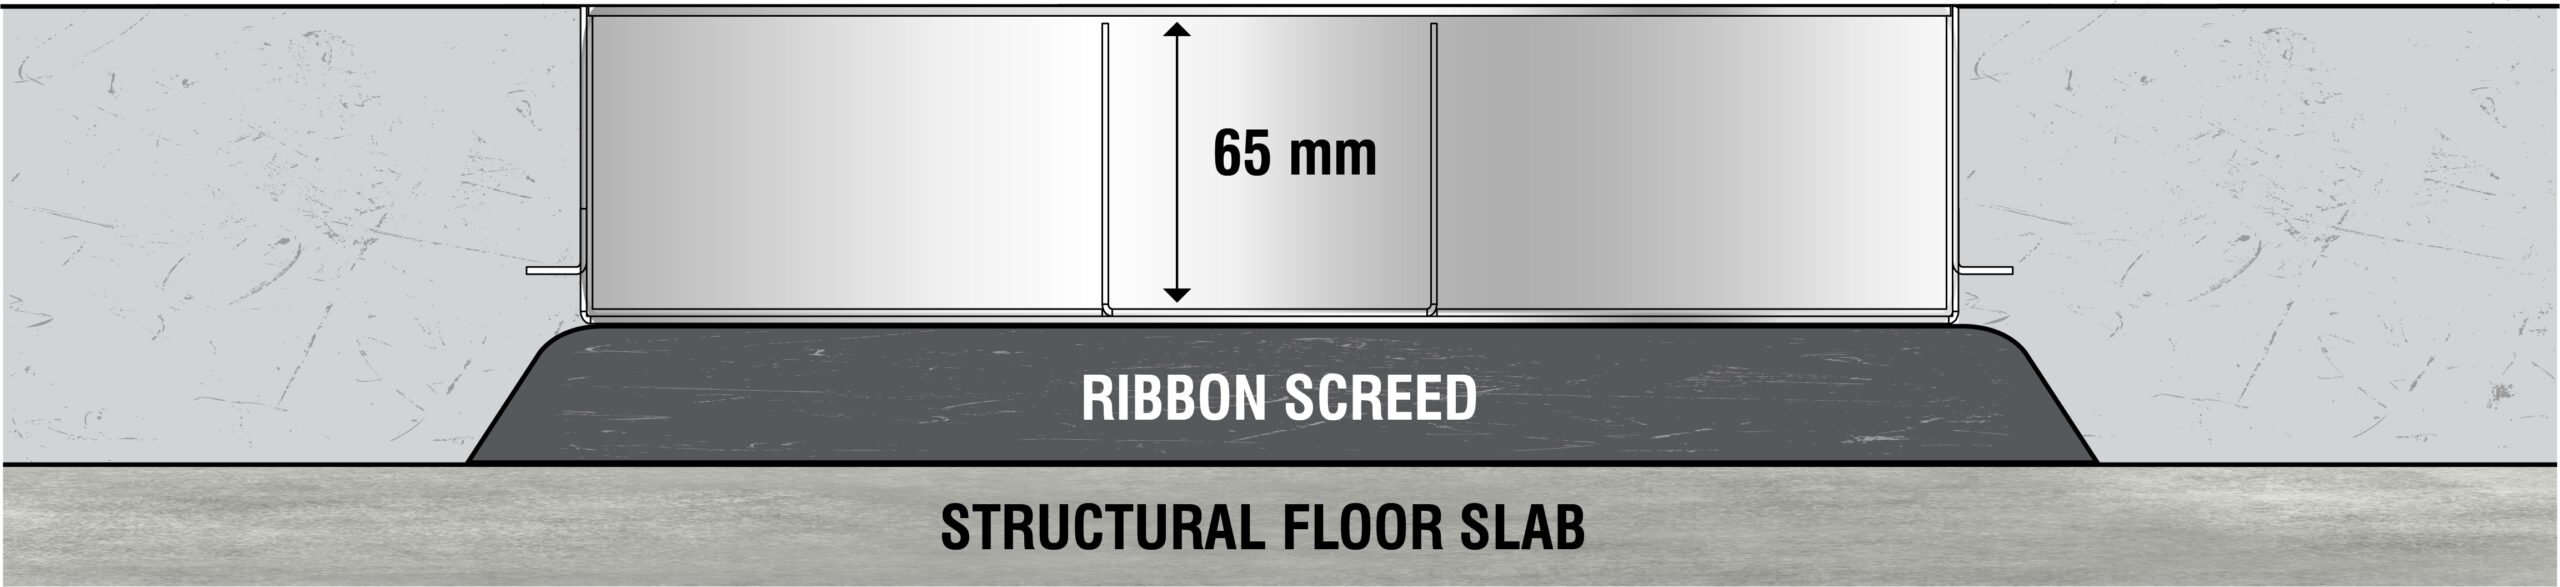
Modular Flush Screed Cross Section
Flush Screed Cross Section
Modular Trunking Features
Intersection
Intersection – Flat Bend
Intersection – Tee
Intersection – Fourway
Technical Information
Modular Flush Screed Trunking
Flush Screed Trunking
This innovative and customisable system can be installed in new developments or in an existing installation. Below are some of our installation guidelines that needs to be considered when using this system.
Access (Existing Installations Only). Adequate space needs to be cut in the screed to allow access for trunking system and access for installation tools.
Solid Foundation. Screed trunking must be installed on a solid foundation and completely supported by a screed ribbon approved by an consultant or architect.
Lids and Service Boxes. The galvanised trunking lids and service boxes should be in position before the screed is poured to ensure the pressure of the screed does not distort the side walls of the trunking.
Levelling. Once the trunking is levelled and before coupling together, the screed ribbon/bedding should be packed under the trunking to remove the possibility of any voids which could create soft spots in the trunking system.
Finishing. Take care when pouring the screed. The screed should be compacted to provide a fixed support for the trunking system and its contents. Ensure the screed is smoothly finished to the trunking lid to prevent any lines showing on the final flooring finish.
Flush Screed Trunking
Screed trunking must be fully supported across its complete width. The minimum screed depth is 68 mm. Service boxes should be installed when the trunking is fitted.